Homemade Chicken Broth for Cats-3 Simple Steps for Beginners
Ever watch your feline companion turn up their nose at plain water? Many pet owners struggle to keep their cats hydrated, especially as they age. What if you could boost their fluid intake while delivering essential nutrients in a form they’ll eagerly lap up?
Table of Contents
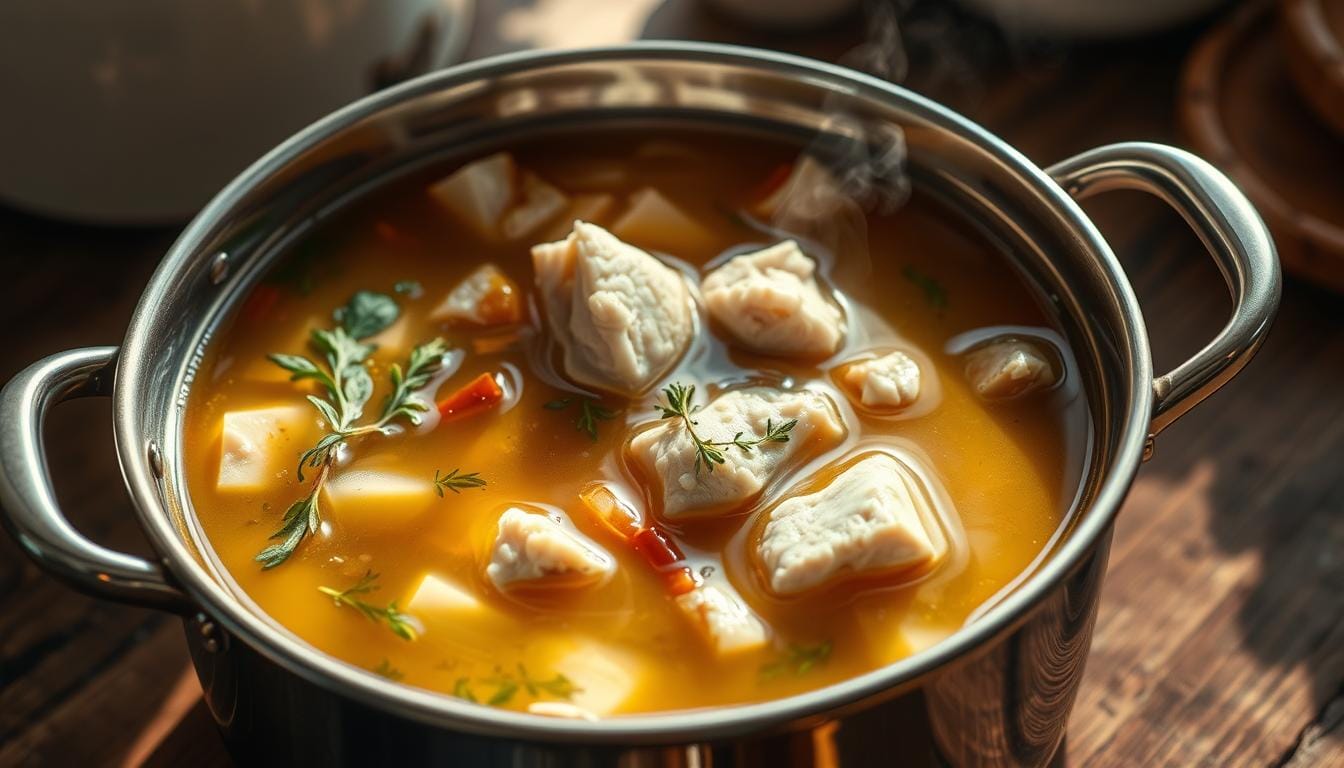
Imagine transforming leftover poultry bones into a savory, nourishing liquid your pet adores. This golden elixir isn’t just tasty—it’s packed with collagen, vitamins, and minerals that support joint health and digestion. Best of all, you control every ingredient, skipping the sodium and additives found in human-grade store versions.
The process requires minimal effort—just bones, water, and common vegetables simmering while you go about your day. Within hours, you’ll create a cost-effective alternative to commercial products, using resources you’d normally discard. Even better? Most kitchen novices achieve perfect results on their first attempt.
Your furry friend deserves meals made with care and intention. By learning this simple technique, you’ll unlock a versatile supplement that enhances regular meals or comforts sick pets. Let’s explore how to craft this wholesome treat safely and efficiently.
Understanding the Health Benefits of Homemade Broth for Your Cat
What if a simple kitchen staple could transform your pet’s hydration habits? This nutrient-rich liquid offers more than just flavor—it’s a natural solution packed with compounds that address common feline health concerns. Let’s break down how this savory supplement can become your furry friend’s new favorite wellness booster.
Hydration and Digestive Support
Many pets don’t drink enough water, risking urinary tract problems. The warm aroma and taste of bone broth entice even finicky drinkers to lap up extra fluids. For animals recovering from stomach issues, it provides gentle nourishment without overwhelming their system. Romeo, a senior tabby with kidney challenges, thrives on daily broth servings that keep him hydrated and energized.
Boosting Immunity and Overall Wellness
The collagen-rich formula does triple duty—supporting joint flexibility, maintaining glossy coats, and strengthening gut lining. Essential minerals like glucosamine target mobility concerns in older companions, while antioxidants help combat everyday toxins. Regular consumption creates a protective barrier against seasonal bugs and improves nutrient absorption from their main meals.
Essential Ingredients for a Nutritious Chicken Broth for Cats
Quality ingredients transform ordinary kitchen scraps into a powerhouse supplement. Your choice of components determines both flavor and nutritional density, making selection crucial for maximum benefit.

Optimal Bone Selection
Seek out organic poultry parts from trusted suppliers—backs and necks deliver ideal collagen extraction. Packages containing 4-4.5 pounds provide sufficient material for concentrated results. Feet (“paws”) boost gelatin content dramatically when available.
Vegetable Additions
Stick to feline-friendly produce: chopped carrots offer beta-carotene while celery stalks contribute essential minerals. A few thyme sprigs add aroma without overpowering sensitive noses. Always rinse vegetables thoroughly before simmering.
Filtered water ensures no chlorine taints your creation. Remember—simpler recipes often yield superior results. Avoid onions, garlic, or salt that could harm your companion animal.
Gathering Your Supplies and Tools
Your equipment choices directly influence both the quality of your creation and how easily it fits into your routine. Let’s explore how different kitchen tools can streamline the process while maximizing nutritional value.
Stock Pot, Instant Pot, or Slow Cooker Options
Three main appliances dominate broth preparation. Each offers unique benefits:
| Tool | Time Required | Best For |
|---|---|---|
| Stock Pot | 12-24 hours | Traditionalists wanting full control |
| Instant Pot | 2 hours | Quick results without sacrificing flavor |
| Slow Cooker | 8-10 hours | Hands-off convenience |
A fine-mesh strainer proves essential for removing bone fragments. Pair it with cheesecloth for crystal-clear results. Keep ice cube trays nearby—frozen portions simplify meal additions.
Sharp knives and sturdy cutting boards speed up veggie prep. Mason jars store leftovers efficiently. Remember: simpler setups often yield better outcomes. Your chosen pot becomes the foundation for a nutrient-dense recipe your pet will adore.
Preparing the Ingredients with Ease
Streamlined preparation turns kitchen basics into a nutrient-packed supplement your pet will love. This no-fuss approach requires minimal effort while maximizing flavor extraction.

Simple Steps for Quick Prep
Place rinsed poultry bones directly into your cooking pot. Residual meat enhances both taste and nutritional value. Whole carrots and celery stalks work perfectly—no chopping needed for stovetop versions.
Different appliances require slight adjustments:
| Appliance | Prep Style | Time Saved |
|---|---|---|
| Stock Pot | Whole vegetables | 5 minutes |
| Instant Pot | Roughly chopped | 15 minutes |
| Slow Cooker | Large chunks | 10 minutes |
Fresh thyme sprigs go in stems-and-all. Cold water rinses away debris without harsh chemicals. This flexible recipe thrives on approximation—measurements needn’t be exact.
From start to simmering, you’ll spend under 20 minutes prepping. The hands-off process lets you multitask while creating a wholesome supplement. Your furry companion gets all the benefits without kitchen stress.
Step-by-Step Cooking Process for Chicken Broth for Cats
Creating a nourishing liquid supplement doesn’t require culinary expertise—just patience and attention to timing. Begin by placing prepared ingredients in your chosen pot and adding filtered water until everything remains submerged. This ensures proper extraction of nutrients without diluting flavor.
Simmering and Timing Guidelines
Different appliances offer varied approaches to achieving optimal results. Never let the mixture reach a rolling boil—gentle heat preserves delicate compounds while breaking down collagen effectively.
| Appliance | Heat Setting | Duration |
|---|---|---|
| Stock Pot | Low flame | 4 hours uncovered |
| Instant Pot | High pressure | 2 hours + 30 min cool |
| Slow Cooker | Low setting | 8 hours covered |
Skim foam periodically during stovetop cooking for clearer results. The Instant Pot method saves time but requires natural pressure release to prevent splattering. Slow cooker versions work best when started before bedtime for morning completion.
Effective Straining Techniques
Safety becomes paramount when handling hot liquids. Position a fine-mesh strainer over a heatproof bowl immediately after cooking. Pour contents slowly to catch any bone fragments that may have developed during simmering.
For ultra-clear stock, line your strainer with unbleached cheesecloth. While appearance matters less to pets, this step removes residual vegetable fibers. Always double-check the strained liquid under bright light before storing.
Discard solids promptly and cool the liquid to room temperature within two hours. This prevents bacterial growth while preserving the homemade stock’s nutritional integrity. Your careful preparation ensures every serving remains risk-free and delicious.
Why Cooling and Freezing Matter for Your Broth
Preserving your homemade creation’s nutrients requires smart storage solutions. Rapid temperature control locks in freshness while preventing bacterial growth, ensuring every serving stays safe and flavorful.
Cooling Down Rapidly for Safety
Transfer strained stock to a metal pot immediately. Place it in an ice-water bath, stirring gently to allow broth cool evenly. Aim for room temperature within 90 minutes—critical for food safety. Refrigerate for 3-4 hours until surface fat solidifies, making it easy to skim.
Practical Freezing Methods
Pour cooled liquid into ice cube trays, filling ¾ full for expansion. Once frozen, transfer cubes to airtight bags labeled with dates. For jars, leave 1-inch headspace and loosely seal lids until contents freeze solid—usually within 24 hours. This prevents cracks while maintaining quality in the freezer for up to 6 months.
These techniques preserve the silky texture and nutrient density your pet deserves. Proper storage turns your kitchen project into a convenient, long-lasting wellness resource.
Read also :
- Dry Cat Food Recipes
- Wet cat Food Recipes
- Special Cat Food Recipes
- Chicken Cat Food Recipes
- Homemade Cat Food Recipes
- Can cats eat chicken and what are the health benefits?
- Can cats have chicken as a protein source? Comprehensive guide
- Can Cats Eat Raw Chicken? Safety Guide for Cat Owners
- Dry Cat Food Brands Loved by Cats and Trusted by Vets
- Best Cat Food for Sensitive Stomach:Top 5 Vet-Approved Picks
- Special Kitty Kitten Food – Learn the Pros and Cons
- prescription cat food-Top 10 Prescription Cat Foods
- Wet Cat Food for Kittens: Top Nutritious Choices 2025
- How Long Can Wet Cat Food Sit Out? Critical Facts
- American Veterinary Medical Association (AVMA)